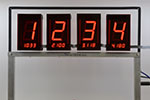
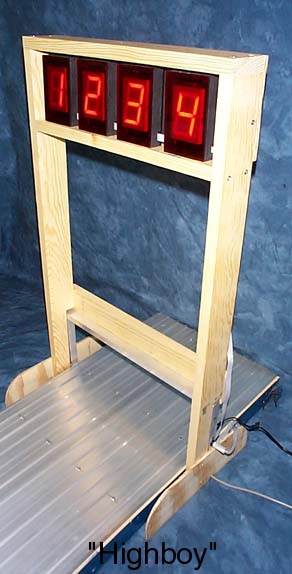
SmartLine "Highboy" Display
We
have finalized the plans to mount the timer displays on a 30"
tall pedestal. The longer cable from the computer to
the displays will allow you to build a tower for
the displays so that more of the spectators will
be able to see the results. You
will be able to use your SmartLine Finish Line
timer, purchase an additional cable and build your
own tower with these free plans.
Highboy Plans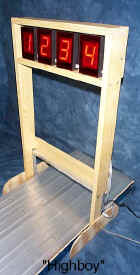
This Highboy
design raises the displays
30 inches high.
The only addition to the standard timer is an
extension cable for the displays.
You may also download the plans for building the
frame in either format:
pdf
format (470KB)
Word document
format (237KB)
Supplies
-
1"x3"
wood of good quality or 3/4" plywood (Plywood
is preferred).
The amount required depends on the width of the
timer and whether you buy sheets of plywood or 1"x3"
pieces of wood.
An estimate for a 4-lane timer is one 1/4 sheet of
plywood (2 feet x 4 feet) or a 10-foot length of 1"x3" wood.
You will need to measure the timer to determine
the amount you need if you change the height or
width.
-
1/4" plywood
The amount required depends on the width of the
timer.
An estimate for a 4-lane timer is one 1/4 sheet of
plywood (2 feet x 4 feet).
-
20
Phillips flathead wood screws
-
Sand
paper and Paint for finishing
Building
Procedure
-
If
you are using a 3/4" plywood sheet, cut it
into 2"-3" by 48" pieces.
From these 48" lengths you can cut one
30" and one 17" length.
-
Cut
two pieces of the 1"x3" into 30-inch lengths.
These will be used for the left and right vertical
pieces.
-
Cut
two pieces of the 1"x3" for the Bottom Horizontal and
Horizontal Above Displays that are the width of
the timer. We used 17-inch
lengths for
our 4-lane
timer. If your timer is longer
than 18" and you used the plywood sheet, you
would have to use another 48" strip.
-
Cut
one piece of the 1"x3" that is 1.5 inches less than
the width of the timer. The measurement for
our Horizontal Below Displays is 15.5".
-
Cut
two pieces that are 4.25" long for the Left and
Right Display Mount pieces.
-
Cut
a 1"x1" notch in the Right Display
Mount. (Right side looking at front.)
For
steps 1-6 refer to Figure 1.
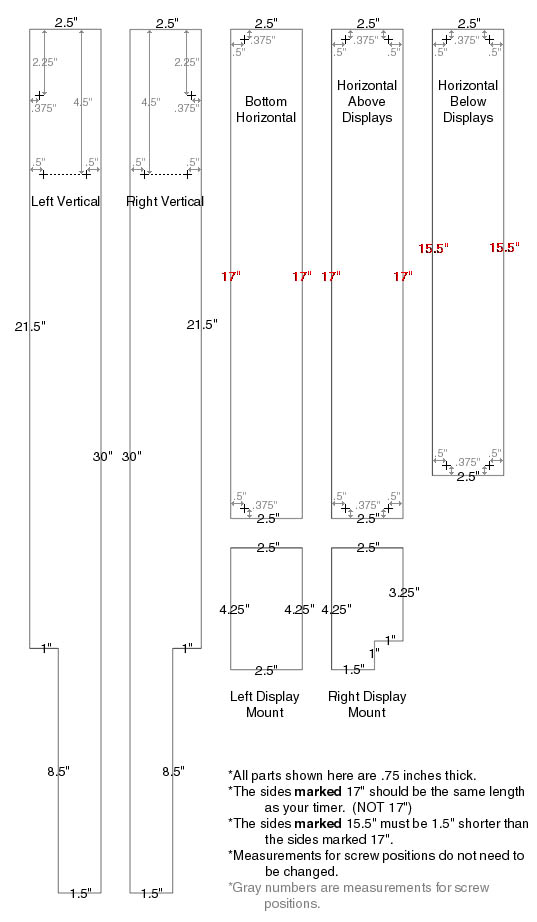
Figure 1
 The
lengths of the vertical 1"x3" pieces only need to be the same as each other. On
the highboy shown, the vertical pieces are 30 inches long.
The
lengths of the vertical 1"x3" pieces only need to be the same as each other. On
the highboy shown, the vertical pieces are 30 inches long.
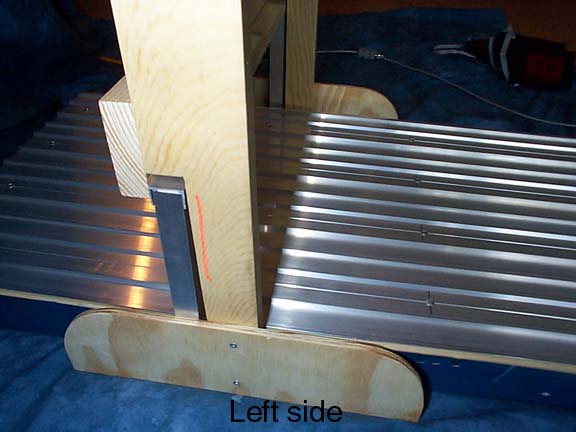
A
corner is cut out of the back edge of the vertical
pieces for the timer.
The cut is 8.5 inches by 1 inch.
The Bottom Horizontal piece is attached so
that there is a ¾” overhang used as an extra
support for the timer.
-
Cut
two pieces that are 12" long
by 3.5"
wide for the Left and
Right Foot pieces. Curve the top of each
foot.
-
Cut
a .5" notch in the Right Foot for the
communication cable.
-
Cut
one piece that is 1.75" less than the
length of the finish line (our is 15.25")
long by 4.25" wide for the Display Mount.
-
Cut
a 1"x1" notch in the corner of the
Display
Mount.
-
Cut
one piece that is the length of the finish line
(ours is 17")
long by 6" wide for the Back Cover.
-
Cut
a 1" X 1.75" notch that is .75" in
from the edge of the Back Cover. For
steps 7-12 refer to Figure 2.
-
Assemble
the Highboy as shown using Phillips flathead wood
screws.
-
The
Left and Right display mounts are placed between
the Back Cover and the Display Mount.
They are screwed in place on the side,
2.25” down from the top.
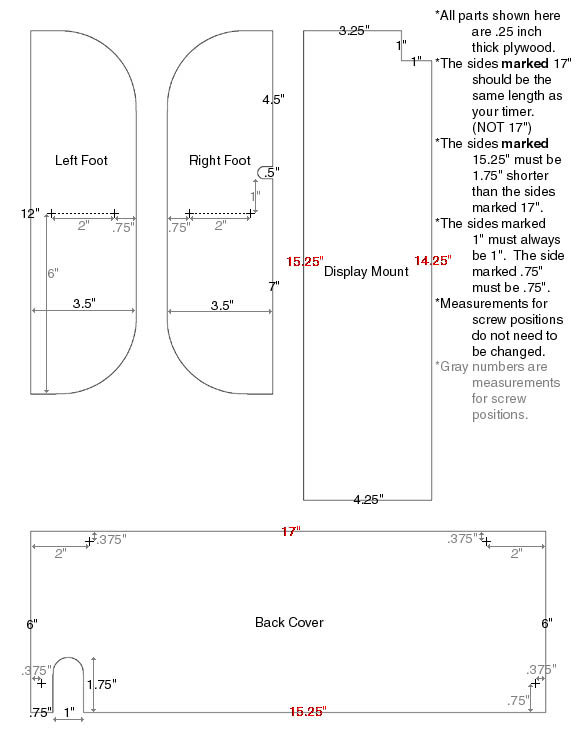
Figure 2